




Choosing between MicroCement and tile starts with the room you want to create. Do you picture a continuous background that lets furniture and light take the lead, or a surface with a visible pattern and rhythm? Both directions can belong in a thoughtful interior. The right decision connects that design intention with the existing surface, preparation and everyday care.
This guide compares those choices from a planning perspective. It does not rank every tile against every MicroCement system or promise that one option always costs less, lasts longer or needs less work. Materials, installation conditions and the way you use the space all matter.
A continuous look or a visible grid?
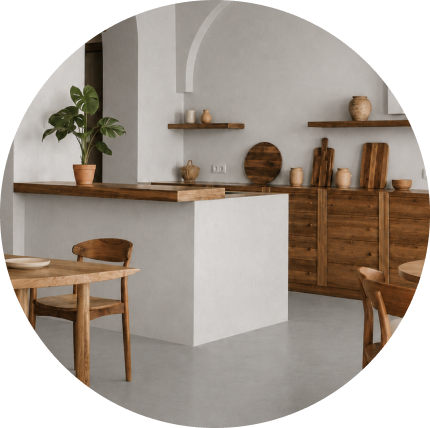
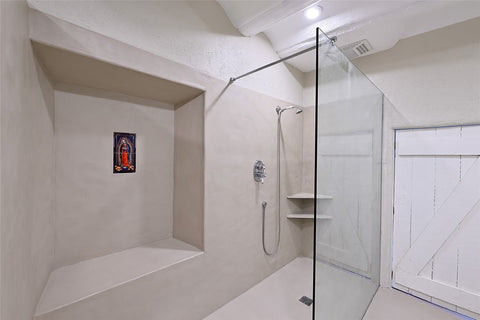
MicroCement is often chosen for its continuous visual effect: broad surfaces without the repeated grout grid associated with tile. Subtle variation in a hand-applied finish can add depth without creating a geometric pattern. That makes the surface part of the atmosphere rather than a series of individual units.
Tile brings another design language. Format, layout and grout color can create a quiet grid, a strong graphic statement or a decorative feature. Larger formats may make joints less prominent, but the module remains part of the composition. Neither approach is inherently more refined; decide whether you want the surface to recede or establish a pattern.
A continuous appearance does not mean construction joints can simply disappear. Required movement joints and transitions need a project-specific plan. Discuss them before finalizing a seamless design, especially where rooms or different substrates meet.
Connect the finish to your design style
For quiet luxury or a contemporary interior, a restrained surface can support tonal furniture, soft textiles and carefully placed lighting. In a Mediterranean-inspired room, warm neutral surfaces can sit alongside timber, woven textures and curved forms. An industrial direction might pair mineral-looking finishes with metal and exposed structural details.
Tile can support those same styles in a different way, through its size, surface and layout. Rather than choosing by a style label alone, make a small material palette. Include cabinetry, fabrics, wood, metal and the proposed floor or wall finish. The relationship between them matters more than an isolated photograph.
Review a DECCO Sample Box in the room before committing to color. Look at it beside your other materials in daylight and under evening lighting. Screens and styled room images are useful references, not substitutes for a physical sample.
Renovation starts underneath the finish
If you already have tile, assess what is there before deciding whether to keep, cover or remove it. Loose pieces, cracks, hollow-sounding areas, uneven transitions and signs of movement need investigation. A decorative coating is not a repair for an unstable base.
MicroCement over existing tile can be an option when the surface is sound and prepared for the selected system. It is not a guarantee of renovation without demolition. Grout joints, adhesion, changes in level and the condition below the tile all influence the preparation. Follow the DECCO Installation Guidelines and request advice when the substrate is uncertain.
Plan practical details alongside the appearance: door clearances, thresholds, adjoining finishes and access during the work. In wet areas, ask about the complete build-up and waterproofing where required. A decorative finish alone should not be treated as a waterproofing specification.
Choose the system by your starting surface
The DECCO Starter Kit is intended for a smooth, stable and properly prepared substrate. The DECCO Resurfacing Kit is the system to review for existing surfaces including tile. That distinction is about preparation needs, not simply the color or room style you prefer.
For showers, wet areas, exteriors and high-traffic floors, review MicroTop MAX. It is DECCO's two-component polyurethane MicroCement system: supplied premixed, activated by adding the specified hardener, and designed for interior and exterior spaces where enhanced performance and durability are priorities. In wet areas it is used as part of the complete DECCO wet-area system, correctly installed and sealed with the specified DECCO topcoat. MicroTop RTU, included in both kits, is the choice when ready-to-use convenience and ease of application come first.
Record each surface separately if your project combines tiled floors, prepared walls or other substrates. Measure the areas and photograph joints and damaged zones. Use Build My System to organize that information and explore a system suggestion, then confirm any unresolved technical conditions before ordering.
Think about routine care from the beginning
Compare care instructions for the actual products you are considering, rather than assuming all tile or all MicroCement behaves alike. For a sealed decorative system, follow the current aftercare guidance for suitable cleaning products, spill management and protection from abrasive dirt. Ask what maintenance the specified sealer requires in your setting.
With tile, consider both the tile surface and its joints. Their care depends on the materials and installation. Avoid blanket claims that one choice is maintenance-free. The useful question is whether the recommended routine fits your household, space and expectations.
Make the final choice as a complete project
Start with your visual goal, check the existing surface and compare complete installation plans rather than finish prices alone. Review samples, preparation, transitions and care together. If you want a continuous aesthetic, explore the DECCO kits with your substrate in mind. If you prefer the rhythm of individual pieces, tile may express that intention. Let design and technical suitability guide the decision together.

